Data Binding is defined as the process in which actually the data of one object is connected to the other object.
Data binding is actually requires one source property to define from where the value is actually going to copy and destination to which the value is copying and an event to specify actually when it is going to copy.
Adobe Flex provides three ways to specify data binding:
- MXML curly braces
- MXML <fx:Binding> tag
- ActionScript BindUtils method
Data Binding-MXML curly braces
Following example demonstrates using curly braces to specify data binding of a source to destination:
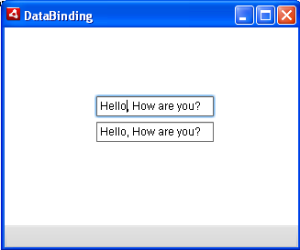
In the given example , two text boxes are there with id’s “text1 and text2” and our aim is to get the value that we are entering in text1 in text2.
<s:TextInput id="text1"/>
<s:TextInput id="text2" text="{text1.text}"/>
And for that in the text property of the second text box we are giving the code like text=”{text1.text}”. Actually this will get the value from text1 and display it in text2.
<s:WindowedApplication
   xmlns:fx="http://ns.adobe.com/mxml/2009"
   xmlns:s="library://ns.adobe.com/flex/spark"
   xmlns:mx="library://ns.adobe.com/flex/mx"
width="320" height="240">
<fx:Script>
</fx:Script>
<fx:Declarations>
<!-- Place non-visual elements (e.g., services, value objects) here -->
</fx:Declarations>
<fx:Binding source="text1.text" destination="text2.text"/>
<s:layout>
<s:VerticalLayout  paddingLeft="100" paddingTop="75"/>
</s:layout>
<s:HGroup>
<s:TextInput id="text1"/>
</s:HGroup>
<s:HGroup>
<s:TextInput id="text2" text="{text1.text}"/>
</s:HGroup>
</s:WindowedApplication>
And the output will look like this :
Data Binding-MXML <fx:Binding> tag
Following example demonstrates using <fx:Binding> tag to specify data binding of a source to destination:
In the given example, we are using the <fx:Binding> tag for data binding instead of the curly braces.
<fx:Binding source="text1.text" destination="text2.text"/>
it has two attributes source and destination . And in the source we will give the id of the field from where we have to take the value and in destination we will give the id of the destination field. So the content of text1 will copy to text2.
<s:WindowedApplication
xmlns:fx="http://ns.adobe.com/mxml/2009"
xmlns:s="library://ns.adobe.com/flex/spark"
xmlns:mx="library://ns.adobe.com/flex/mx"
width="320" height="240">
<fx:Script>
</fx:Script>
<fx:Declarations>
<!-- Place non-visual elements (e.g., services, value objects) here -->
</fx:Declarations>
<fx:Binding source="text1.text" destination="text2.text"/>
<s:layout>
<s:VerticalLayout  paddingLeft="100" paddingTop="75"/>
</s:layout>
<s:HGroup>
<s:TextInput id="text1"/>
</s:HGroup>
<s:HGroup>
<s:TextInput id="text2"/>
</s:HGroup>
</s:WindowedApplication>
And the output will look like this:
Data Binding- ActionScript BindingUtils
Following example demonstrates using BindingUtils to specify data binding of a source to destination:
In the given, we are using BindingUtils in Actionscript for data binding instead of the curly braces and <fx:Binding > tag.
So for this we are importing
import mx.binding.utils.BindingUtils;.
And in the preinitialize attribute of the tex2 we are calling the “text2_preinitializeHandler”
<s:TextInput id="text2" preinitialize="text2_preinitializeHandler(event)"/>
and the code for text2_preinitializeHandler will be like this:
protected function text2_preinitializeHandler(event:FlexEvent):void
{
BindingUtils.bindProperty(text2,"text",text1,"text");
}
And inside the BindingUtils atribute we are setting actually copying and setting the value. In this “text2” is the id of the destination field and “text1” is the id of the source field. And the property we are copying is “text”.Now see the complete example:
<pre><s:WindowedApplication xmlns:fx="http://ns.adobe.com/mxml/2009"
xmlns:s="library://ns.adobe.com/flex/spark"
xmlns:mx="library://ns.adobe.com/flex/mx"
width="320" height="240">
<fx:Script>
<![CDATA[
import mx.binding.utils.BindingUtils;
import mx.events.FlexEvent;

protected function text2_preinitializeHandler(event:FlexEvent):void
{
BindingUtils.bindProperty(text2,"text",text1,"text");
}

]]>
</fx:Script>
<fx:Declarations>
<!-- Place non-visual elements (e.g., services, value objects) here -->
</fx:Declarations>

<s:layout>
<s:VerticalLayout  paddingLeft="100" paddingTop="75"/>
</s:layout>
<s:HGroup>
<s:TextInput id="text1"/>
</s:HGroup>
<s:HGroup>
<s:TextInput id="text2" preinitialize="text2_preinitializeHandler(event)"/>
</s:HGroup>
</s:WindowedApplication>
And the output will look like this:
These are the three different ways in which we can use data binding in flex.

