 Sharing your Laptop/PC’s Internet connection over WiFi will make it possible to connect your smartphone to internet over WiFI without the need of a data connection. When it comes to Windows desktops, it is as easy as downloading one of the tools like Connectify and creating a hotspot in one click. Such Hotspots are called Infrastructure or Access point mode WiFi hotspots. But in Ubuntu things are not as easy as it is in Windows. There is an option to create wireless networks/hotspots in Ad-hoc mode, but such hotspots are very different from Infrastructure WiFi Hotspots and a typical Android or Windows device would not detect it as a WiFi Hotspt(though, the old Nokia Symbian could!).
But, as in all cases, there is some work-around available in Ubuntu which makes you able to create an Infrastructure WiFi Hotspot in Ubuntu.
There are two ways you can do it. The first one is by using a tool called ap-hotspot. The second method requires a bit of manual configuration, and I would not prefer you to go with second method unless you encounter an error in first method.
Method 1: Using ap-hotspot
This is as simple as installing the tool called ap-hotspot and giving a name and password for your hotspot and start it.
Firstly Install ap-hotspot:
sudo add-apt-repository ppa:nilarimogard/webupd8
sudo apt-get update
sudo apt-get install ap-hotspot
Install hostapd:
64 bit:
wget http://old-releases.ubuntu.com/ubuntu/pool/universe/w/wpa/hostapd_1.0-3ubuntu2.1_amd64.deb
sudo dpkg -i hostapd*.deb
sudo apt-mark hold hostapd
32 bit:
wget http://old-releases.ubuntu.com/ubuntu/pool/universe/w/wpa/hostapd_1.0-3ubuntu2.1_i386.deb
sudo dpkg -i hostapd*.deb
sudo apt-mark hold hostapd
After installation, execute the following command, whenever you want to start your hotspot.
sudo ap-hotspot start
First time when you run the command, it will ask you for a hotspot name and password. There after it will remember these details and start your hotspot automatically.
In case, if you need change the name or password, execute the following:
sudo ap-hotspot configure
To stop hotspot:
sudo ap-hotspot stop
Method 2: Using hostapd
Below is the three steps to do the same which is tested working in Ubuntu 12.04 LTS and might work in other versions also. Follow these only if the first method is not working for you.
1. Install hostapd
Hostapd is a WiFi management tool which we use to create our WiFi Hotspot. It is available in Ubuntu Software Center. You may get a link to it from the following page:
User space IEEE 802.11 AP and IEEE 802.1X/WPA/WPA2/EAP Authenticator
Or you can install it using aptitude as follows:
sudo apt-get install hostapd
2. Install ISC DHCP Server
ISC DHCP server is used to dynamically allocate an IP address to the devices which connects your hotspot so it can uniquely identify your device and route the packets you requested to your device through this IP. You don’t really need to worry about all these, you just need to install it, noting more!
As before, the installation packages are available in Software Center:
ISC DHCP server for automatic IP address assignment
Or install it using apt-get:
sudo apt-get install isc-dhcp-server
3. Configure hostapd and ISC DHCP Server
This step might be little longer than the previous two. For the sake of simplicity I divided it into 3 sub steps.
- Set up the Script to Create a WiFI Hotspot
Download the following bash script and extract it to somewhere, say, your home folder: install_wifi_access_point.sh.zip
Make it executable by using the following command:sudo chmod +x install_wifi_access_point.sh
- Run the Script to create a Ubuntu Service
Execute the script by the command:sudo ./install_wifi_access_point.sh
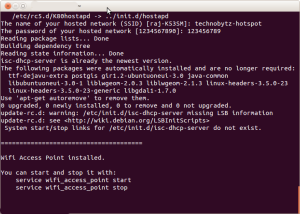
It will ask for a name for your WiFi accesspoint and a password for authentication.

- Start your WiFi Hotspot
Now you can start or stop your WiFi Hotspot at any time using the following commands (no need to repeat the previous steps).
To Start:
sudo service wifi_access_point start
To Stop:
sudo service wifi_access_point stop
The bash script provided above will automate all the required configurations for hostapd and isc dhcp server, thanks to the great guy named, Dashamir Hoxha who wrote it.
Now, if you are a kind of Linux geek and want to do all the configurations by yourself, follow this guide.


8 comments
getting the following error while starting …please help ….
ajeet@ajeet-Inspiron-N4010:~$ sudo service wifi_access_point start
isc-dhcp-server stop/waiting
* Stopping advanced IEEE 802.11 management hostapd [ OK ]
network-manager stop/waiting
network-manager start/running, process 18773
* Starting advanced IEEE 802.11 management hostapd [fail]
isc-dhcp-server start/running, process 18936
ajeet@ajeet-Inspiron-N4010:~$
Doesn’t work – I see it on my android device but I cannot connect
Try the first method.
Unable to start the hotspot .It is showing the following error message “Failed to start wifi_access_point.service: Unit wifi_access_point.service failed to load: No such file or directory.”
Try the first method.
This is fantastic. The script works really well.
Thanks
[…] Create a WiFi Hotspot on your laptop and let your android device connect to it. OR […]
geting error in 2nd method, first method also not working
Failed to start wifi_access_point.service: Unit wifi_access_point.service not found.